
Photorealistic Rendering Techniques for Interior Design
Here’s a detailed and professional breakdown of Photorealistic Rendering Techniques in Interior Design—perfect for a blog, portfolio, or educational piece:
Photorealistic Rendering Techniques in Interior Design :
Photorealistic interior design rendering entails the development of lifelike 3D visual representations of interior environments, with the objective of accurately portraying the atmosphere, illumination, textures, and materials. Essential techniques encompass careful attention to detail, appropriate lighting arrangements, premium textures and materials, as well as post-processing to enhance the final image.
Photorealistic rendering has revolutionized interior design by transforming abstract ideas into lifelike visualizations that feel indistinguishable from real photographs. Whether for client presentations, marketing, or design development, mastering these techniques can elevate your work and dramatically improve communication and trust.
The Magic of Photorealistic Rendering for Interior Design: How Photorealistic Rendering is Transforming the Design Industry
In interior designing, photorealistic rendering aids in presenting such ideas, making the presentation much clearer on how materials and colors are going to interact within the space, and it’s easier for the clients to really imagine the final product.
RELATED : Photorealistic Rendering Bringing Imagination to Life
The advent of photorealistic rendering, which allows for the creation of exceptionally realistic digital mockups of environments, has introduced new opportunities for both designers and their clients. This article will delve into the wonders of photorealistic rendering and its impact on the design sector.
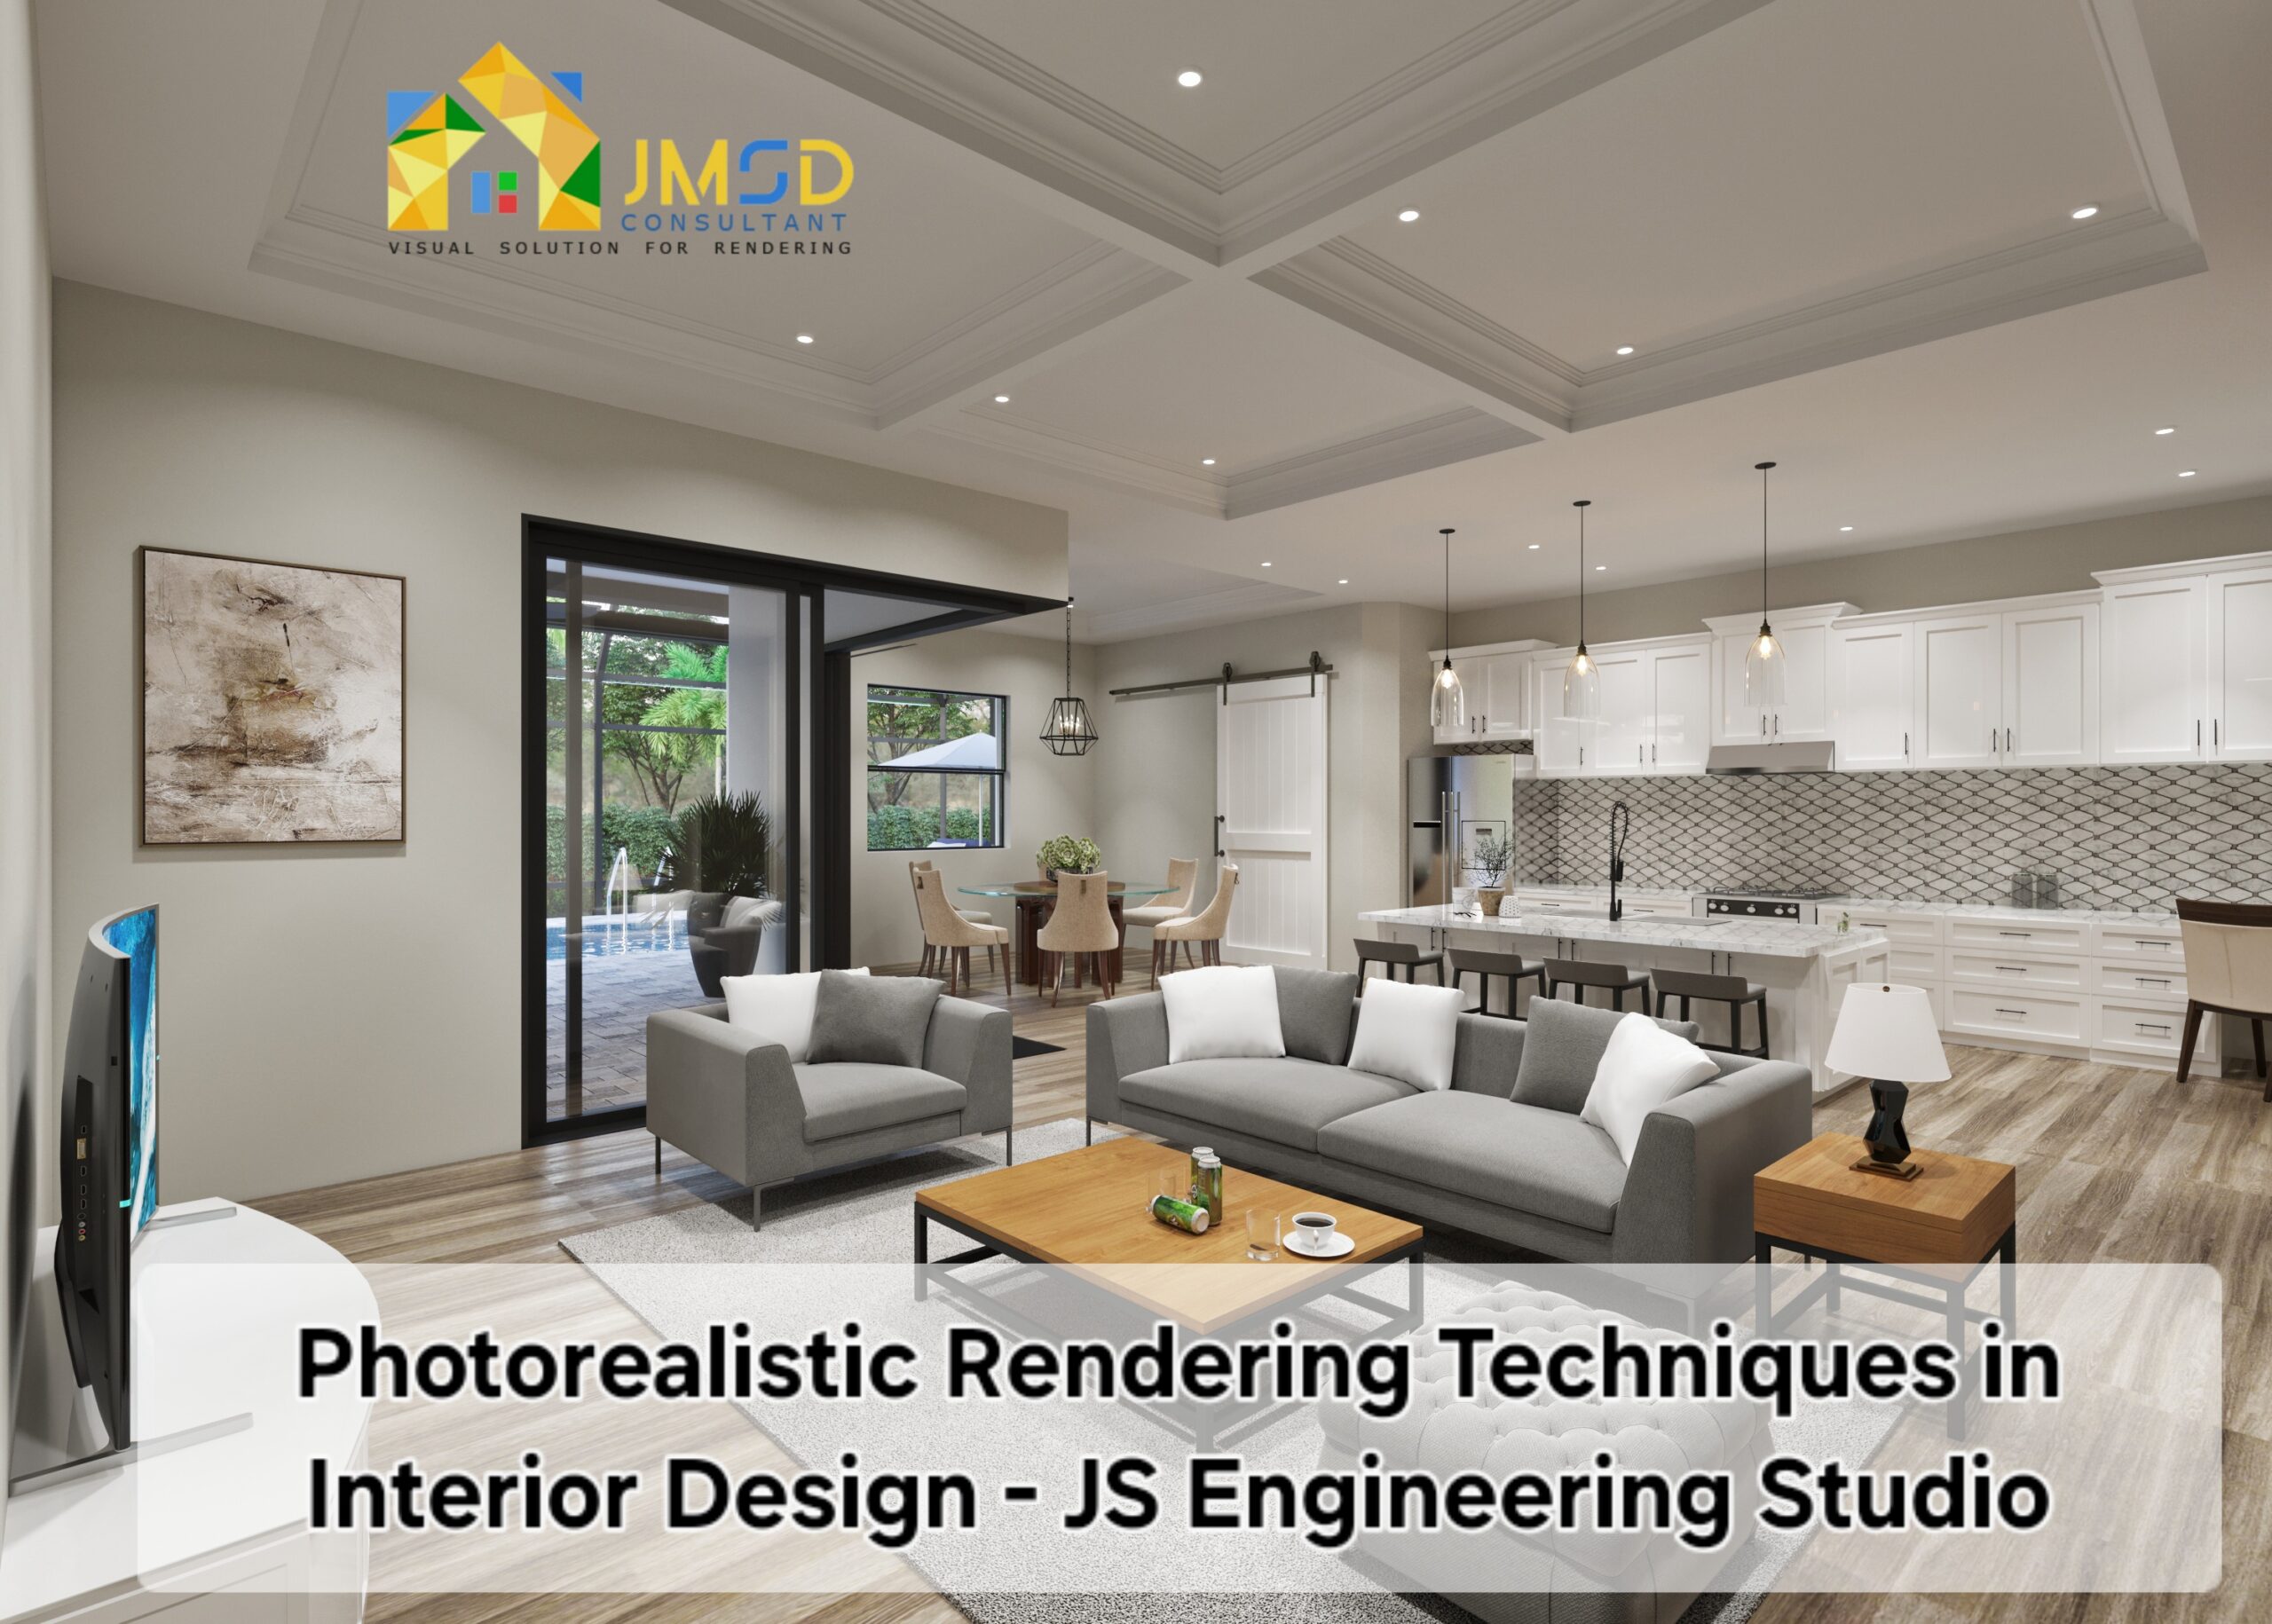
Our 3D interior artists produce lifelike Interior Design Renderings, capturing the atmosphere, mood, and all components of the overall scene, while also choosing suitable decor.
🎨 1. Mastering Lighting for Mood and Realism
Lighting is the cornerstone of photorealism. It shapes atmosphere, depth, and material perception.
Use for:
- Natural Lighting: Mimic realistic daylight using HDRI environments and sun-sky systems. Pay attention to window placement and time of day.
- Artificial Lighting: Combine point lights, area lights, and IES profiles to replicate real-world fixtures like lamps and ceiling lights.
- Global Illumination (GI): Enable GI in your rendering engine for natural light bouncing and color bleed, enhancing realism.
✅ Tip: Balance light sources—avoid overly bright or dark scenes. Aim for natural contrast and soft shadows.
🧱 2. High-Quality Materials & PBR Texturing
Materials should look and behave like their real-life counterparts.
Achieve this through:
- PBR (Physically Based Rendering) materials that include:
- Diffuse/Albedo maps (color)
- Roughness/Glossiness maps (surface reflection)
- Normal/Bump maps (surface texture)
- Displacement maps (geometry variation)
- Reflections and refractions for glass, mirrors, and polished surfaces
- Subtle imperfections like scratches, fingerprints, or wear
✅ Tip: Use material libraries (e.g., Poliigon, Quixel Megascans) to access professional-grade textures.
📐 3. Realistic Camera Setup & Composition
Render your scene as if you were photographing a real room:
- Use physical camera settings (ISO, f-stop, shutter speed) to control exposure and depth of field
- Apply the rule of thirds, leading lines, and symmetry for strong composition
- Add slight lens distortion and vignetting to mimic real camera behavior
✅ Tip: Place the camera at a realistic human eye height (approx. 5.5 ft or 1.6m) to simulate natural viewing.
🪞 4. Accurate Interior Styling & Scene Detailing
Photorealistic renders require more than architectural accuracy—they demand lifestyle storytelling:
- Include realistic furniture models with proper scale and design consistency
- Add decor items like cushions, books, plants, lamps, and wall art
- Use proper object placement for balance and realism (clutter vs. clean design)
✅ Tip: Create slight asymmetries and natural variations—perfect symmetry often looks artificial.
🌆 5. Environmental Context & Window Views
What you see through windows matters:
- Use high-resolution backplates or HDRIs for realistic outside views
- Match lighting conditions inside with what’s visible outside
- Add reflections on glass to blend interior and exterior environments seamlessly
✅ Tip: Use alpha-masked vegetation or background images for visual depth outside the windows.
🎬 6. Post-Processing for Final Polish
Even the best raw render benefits from careful post-production:
- Adjust color balance, contrast, exposure, and white balance
- Add bloom, glare, or lens flares for mood
- Sharpen slightly and remove noise or artifacts
✅ Tip: Use Photoshop, Lightroom, or render engine-specific compositors like V-Ray’s VFB or Corona’s CIE.
⚙️ 7. Use Industry-Leading Software & Render Engines
To get the best results, use tools built for realism:
- Modeling: SketchUp, Blender, 3ds Max, Rhino
- Rendering: V-Ray, Corona Renderer, Lumion, Enscape, Twinmotion
- Texturing: Substance 3D, Quixel, Poliigon
- Post-Processing: Photoshop, Lightroom, After Effects
✅ Tip: Choose the software that best fits your workflow and budget—realism is about technique more than tool.
Conclusion: Design That Feels Real
Photorealistic interior rendering is about blending technical precision with artistic sensibility. It’s not just about showing a space—it’s about helping clients feel it.
By mastering these techniques, interior designers can:
- Communicate ideas with greater impact
- Reduce project uncertainty
- Speed up approvals and revisions
- Deliver immersive, unforgettable experiences
Would you like this turned into a guidebook PDF, a presentation, or a portfolio page?
Discover the enchantment of photorealistic rendering firsthand at JS Engineering Studio. Contact us today for 3D Rendering services, or reach out via email at info@jsengineering.org.